In today's digital age, visual content plays a pivotal role in engaging and captivating online audiences. As a blogger, incorporating an image gallery into your Blogger template can significantly enhance the visual appeal of your content and make your blog posts more interactive. In this article, we'll walk you through the process of creating a simple yet stunning image gallery using just HTML on the Blogger platform. So, let's dive in and learn how to transform your blog with an enticing image gallery!
 |
| Create Image Gallery for Blogger Template Free |
Understanding the Power of Image Galleries
Before we delve into the technicalities, let's briefly discuss why adding an image gallery to your Blogger template is a great idea. Image galleries allow you to showcase your visual content in an organized and elegant manner. Whether you're a travel blogger sharing your adventures or a food enthusiast displaying your culinary creations, an image gallery can capture your audience's attention and keep them engaged.
Step-by-Step Guide to Creating an Image Gallery
Step 1: Accessing the Blogger Dashboard
Log in to your Blogger account and access the dashboard where you manage your blog posts, layouts, and settings.
Step 2: Creating a New Post
Click on the "Posts" tab on the left-hand side of the dashboard and select "New Post" to create a new blog post. This post will serve as the container for your image gallery.
Step 3: Switching to HTML Mode
After creating a new post, switch to HTML mode by clicking on the "HTML" tab at the top right corner of the post editor. This will allow you to input custom HTML code for your image gallery.
Step 4: Building the Image Gallery
Here's the HTML code structure to create a basic image gallery:
<div class="image-gallery">
  <a href="image1.jpg" target="_blank">
    <img src="image1.jpg" alt="Image 1">
  </a>
  <a href="image2.jpg" target="_blank">
    <img src="image2.jpg" alt="Image 2">
  </a>
  <!-- Add more image entries as needed -->
</div>
In this code, replace "image1.jpg" and "image2.jpg" with the URLs or paths to your actual images. You can also add more <a> elements to include additional images in your gallery.
Step 5: Styling the Gallery
To make your image gallery visually appealing, you can add CSS styles. Here's an example of how you can style your gallery:
<style>
  .image-gallery {
    display: grid;
    grid-template-columns: repeat(3, 1fr);
    gap: 10px;
  }

  .image-gallery a {
    display: block;
    transition: transform 0.3s ease-in-out;
  }

  .image-gallery a:hover {
    transform: scale(1.05);
  }

  .image-gallery img {
    max-width: 100%;
    height: auto;
  }
</style>
This CSS code sets up a grid layout for the gallery, adds a border to each image, and creates a zoom effect when hovering over an image.
Step 6: Adding the Gallery to Your Post
Switch back to the "Compose" mode in the Blogger post editor. You should now see your image gallery displayed in the post. You can add accompanying text or captions as needed.
Step 7: Preview and Publish
Before publishing, preview your post to ensure that the image gallery appears as desired. If everything looks good, go ahead and hit the "Publish" button to make your image gallery post live on your blog.
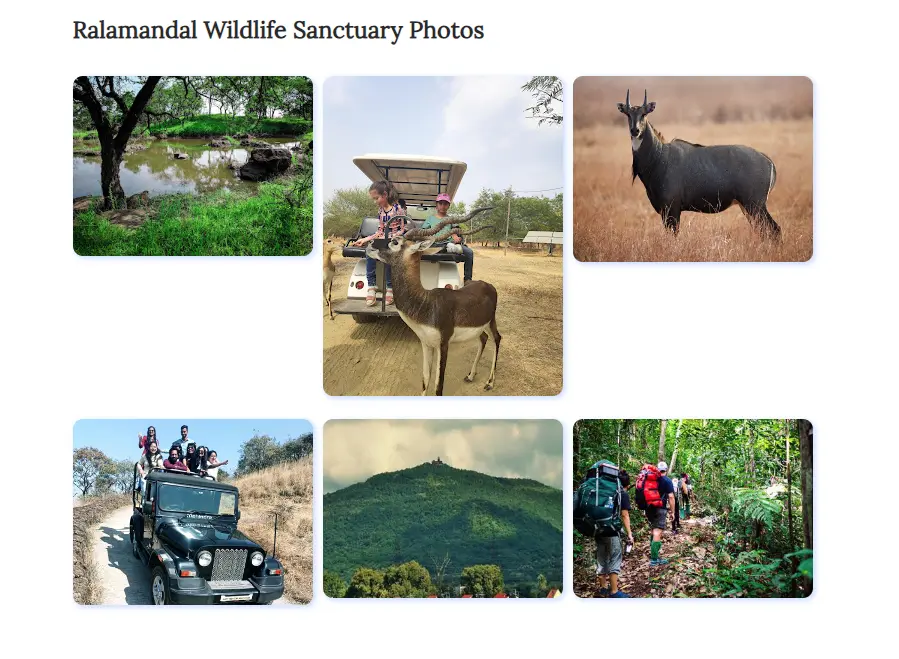
The working demo of this code has been picked from this blog: Namaste Indore - Click to see live demo.
Conclusion
Congratulations! You've successfully created a simple yet captivating image gallery using HTML on the Blogger platform. Adding visual elements like image galleries can elevate your blog's aesthetics and enhance the overall user experience. By customizing the styling and layout, you can create a unique image gallery that aligns with your blog's theme and content. So, start implementing this guide and transform your blog into a visually engaging masterpiece that your audience will love to explore.
Remember, experimenting with different styles and layouts can help you find the perfect image gallery design that resonates with your blog's personality. Happy blogging!
Image Gallery Blogger Template - Frequently searched keywords
Image Gallery Blogger Template, Image Gallery Blogger, Image Gallery Blogger Template Free, Image Gallery Blogger Picasa, how to create image gallery in blogger, how to create a clickable image gallery slider for blogger, blogger how to create image gallery, how to make a clickable image gallery with multiple images on blogger, how to create a responsive clickable image gallery carousel for blogger