Learn about the latest .NET Productivity features
Tooling improvements

Add file header allows you to easily add file headers to existing files, projects, and solutions using EditorConfig. You’ll first need to add the file_header_template rule to your .editorconfig file. Then, set the value to equal the header text you’d like applied. Next, place your caret on the first line of any C# or Visual Basic file. Press (Ctrl+.) to trigger the Quick Actions and Refactorings menu and select Add file header.

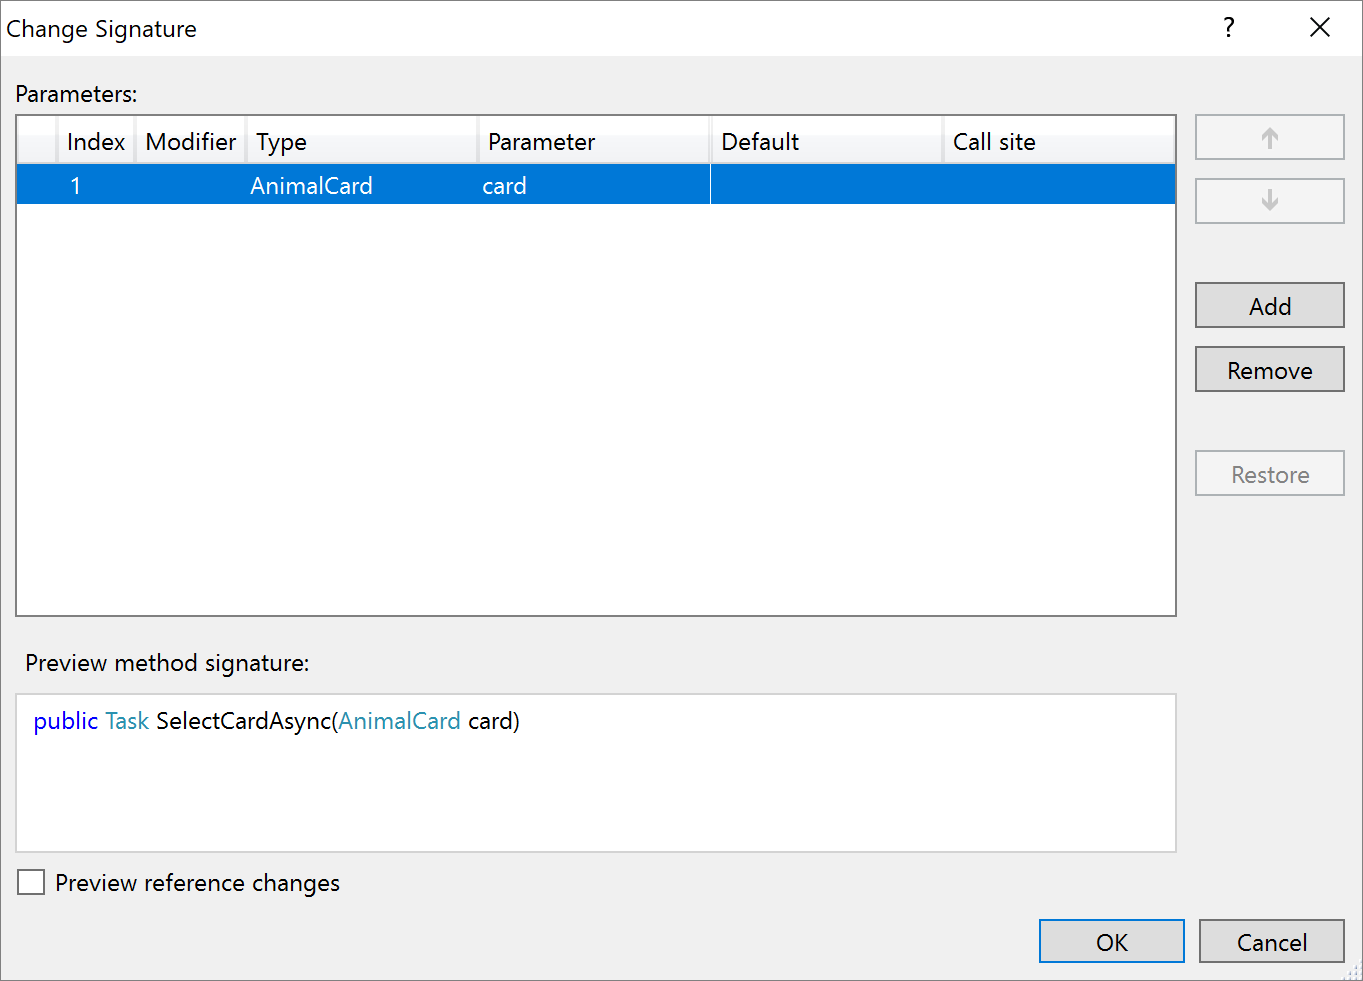
The change method signature dialog now allows you to add a parameter. Place your caret within the method’s signature. Press (Ctrl+.) to trigger the Quick Actions and Refactorings menu and select Change signature. The following dialog will open where you can now select Add to add a parameter.
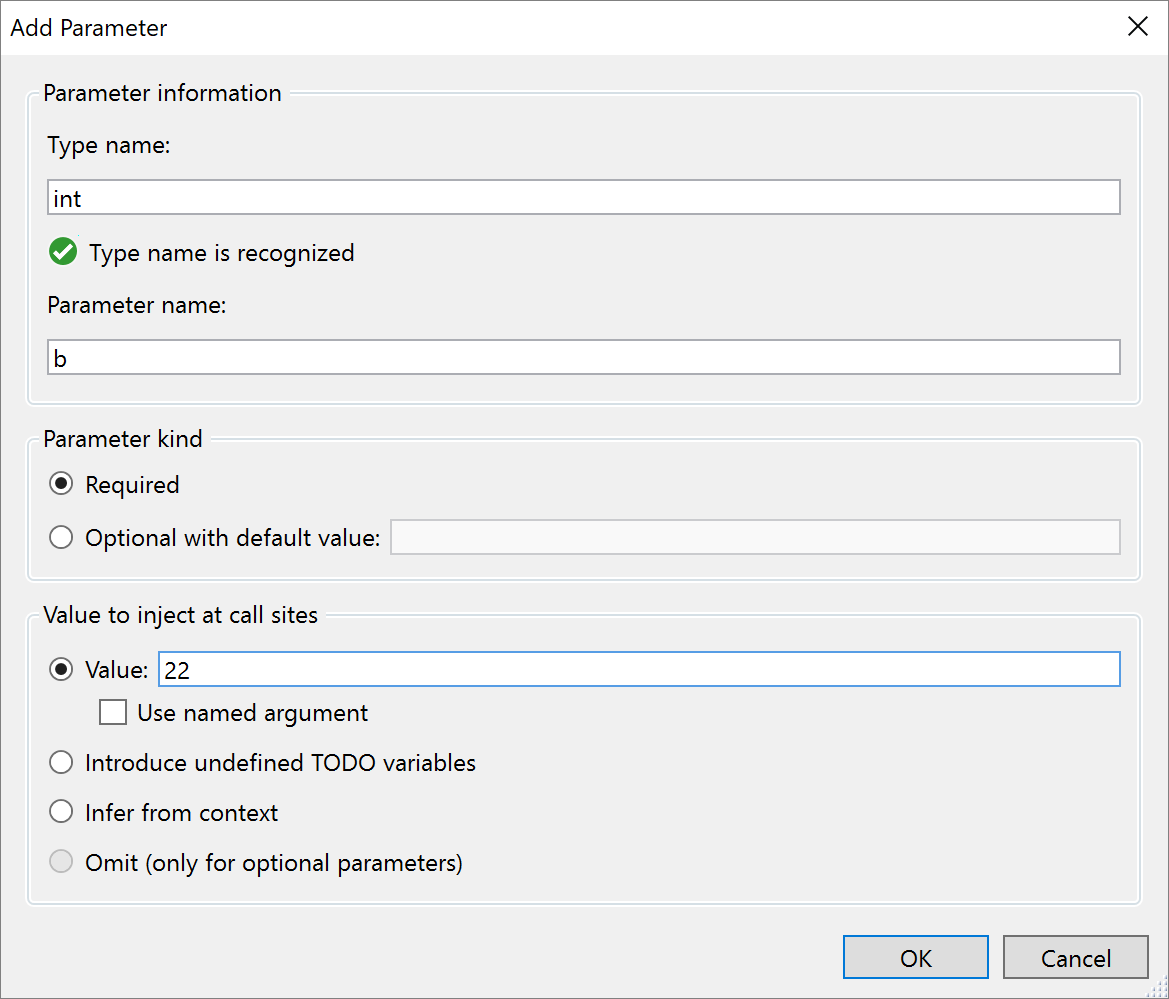
Once you select Add, the new Add Parameter dialog opens. The Add Parameter dialog allows you to add a type name and a parameter name. You can choose to make the parameter required or optional with a default value. You can then add a value at the call site and choose a named argument for that value or you can introduce a TODO variable. The TODO variable puts a TODO in your code so you can visit each error and go through each call site independently and decide what to pass. For optional parameters you have the option to omit the call site completely.
Code fixes and refactorings
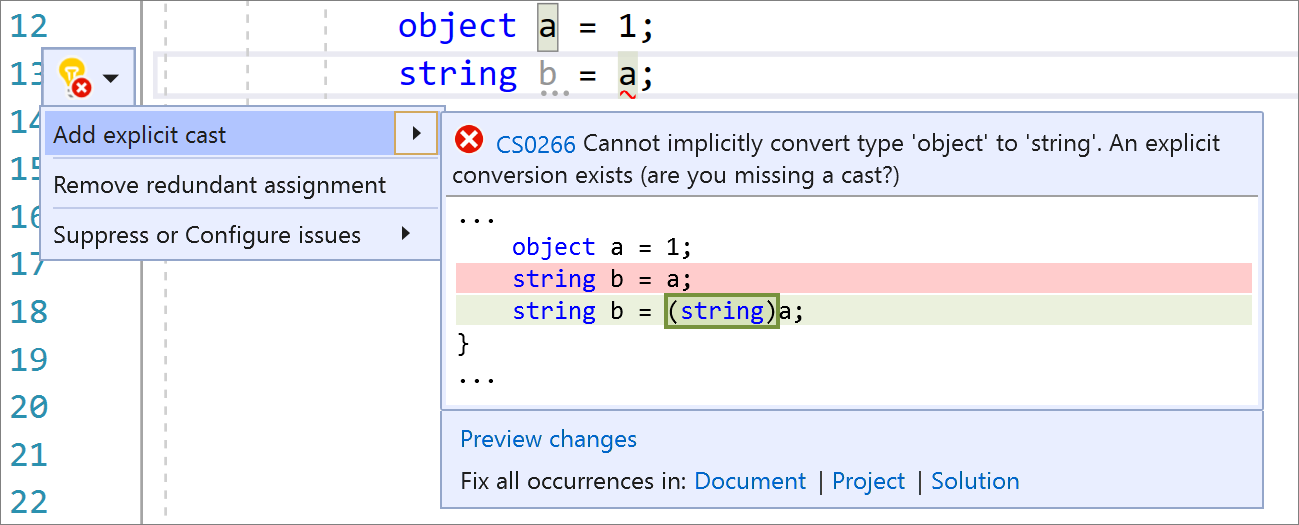
The add explicit cast code fix allows you to add an explicit cast when an expression cannot be implicitly cast. Place your caret on the error. Press (Ctrl+.) to trigger the Quick Actions and Refactorings menu and select Add explicit cast.
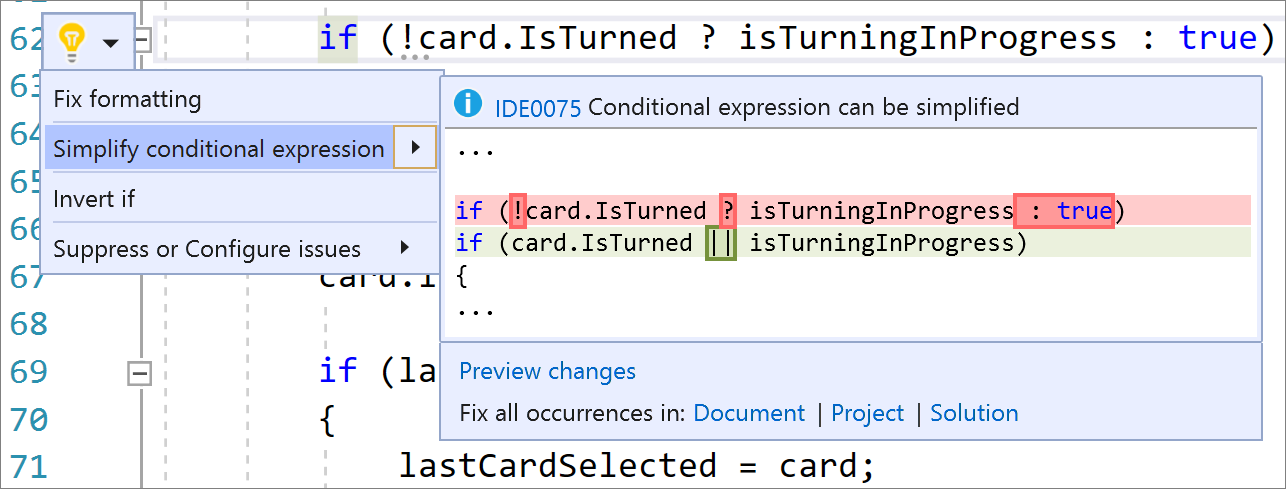
The simplify conditional expression refactoring simplifies conditional expressions to be more legible and concise. Place your caret on the conditional expression. Press (Ctrl+.) to trigger the Quick Actions and Refactorings menu and select Simplify conditional expression.
Have you ever wished you could easily read or convert to a verbatim string? Now you have a refactoring at your fingertips to convert between regular string and verbatim string literals. Place your caret on either the regular string or the verbatim string literal. Press (Ctrl+.) to trigger the Quick Actions and Refactorings menu. Next, select from one of the following:
Select Convert to verbatim string:

Select Convert to regular string:

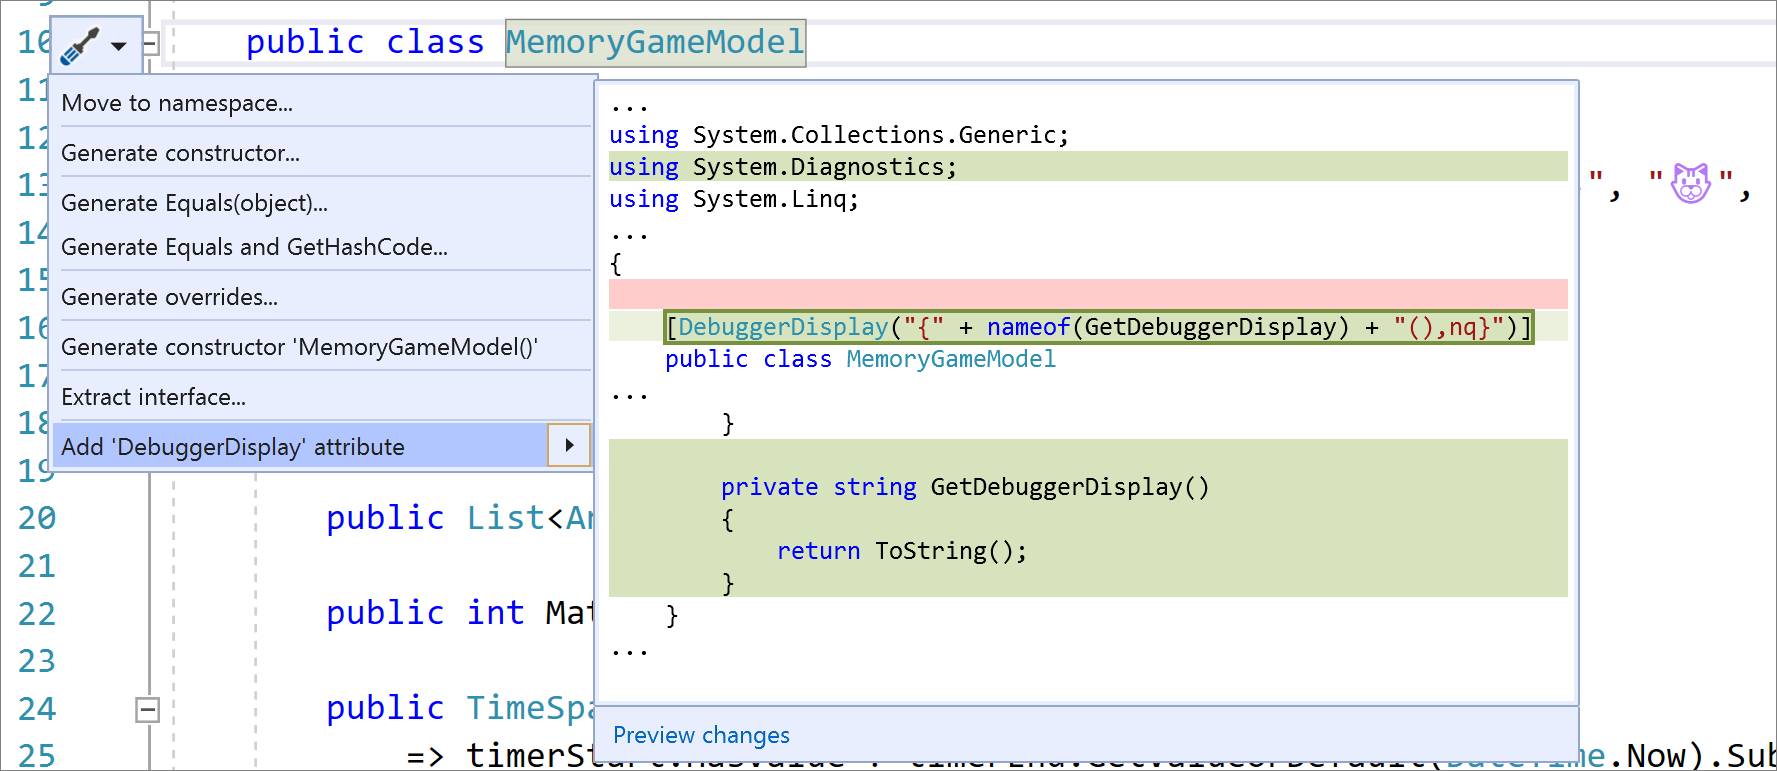
The add debugger display attribute refactoring allows you to pin properties within the debugger programmatically in your code. Place your caret on the class name. Press (Ctrl+.) to trigger the Quick Actions and Refactorings menu and select Add ‘DebuggerDisplay’ attribute. This will add the debugger display attribute to the top of your class and generate an auto method that returns ToString(), which you can edit to return the property value you want pinned in the debugger.
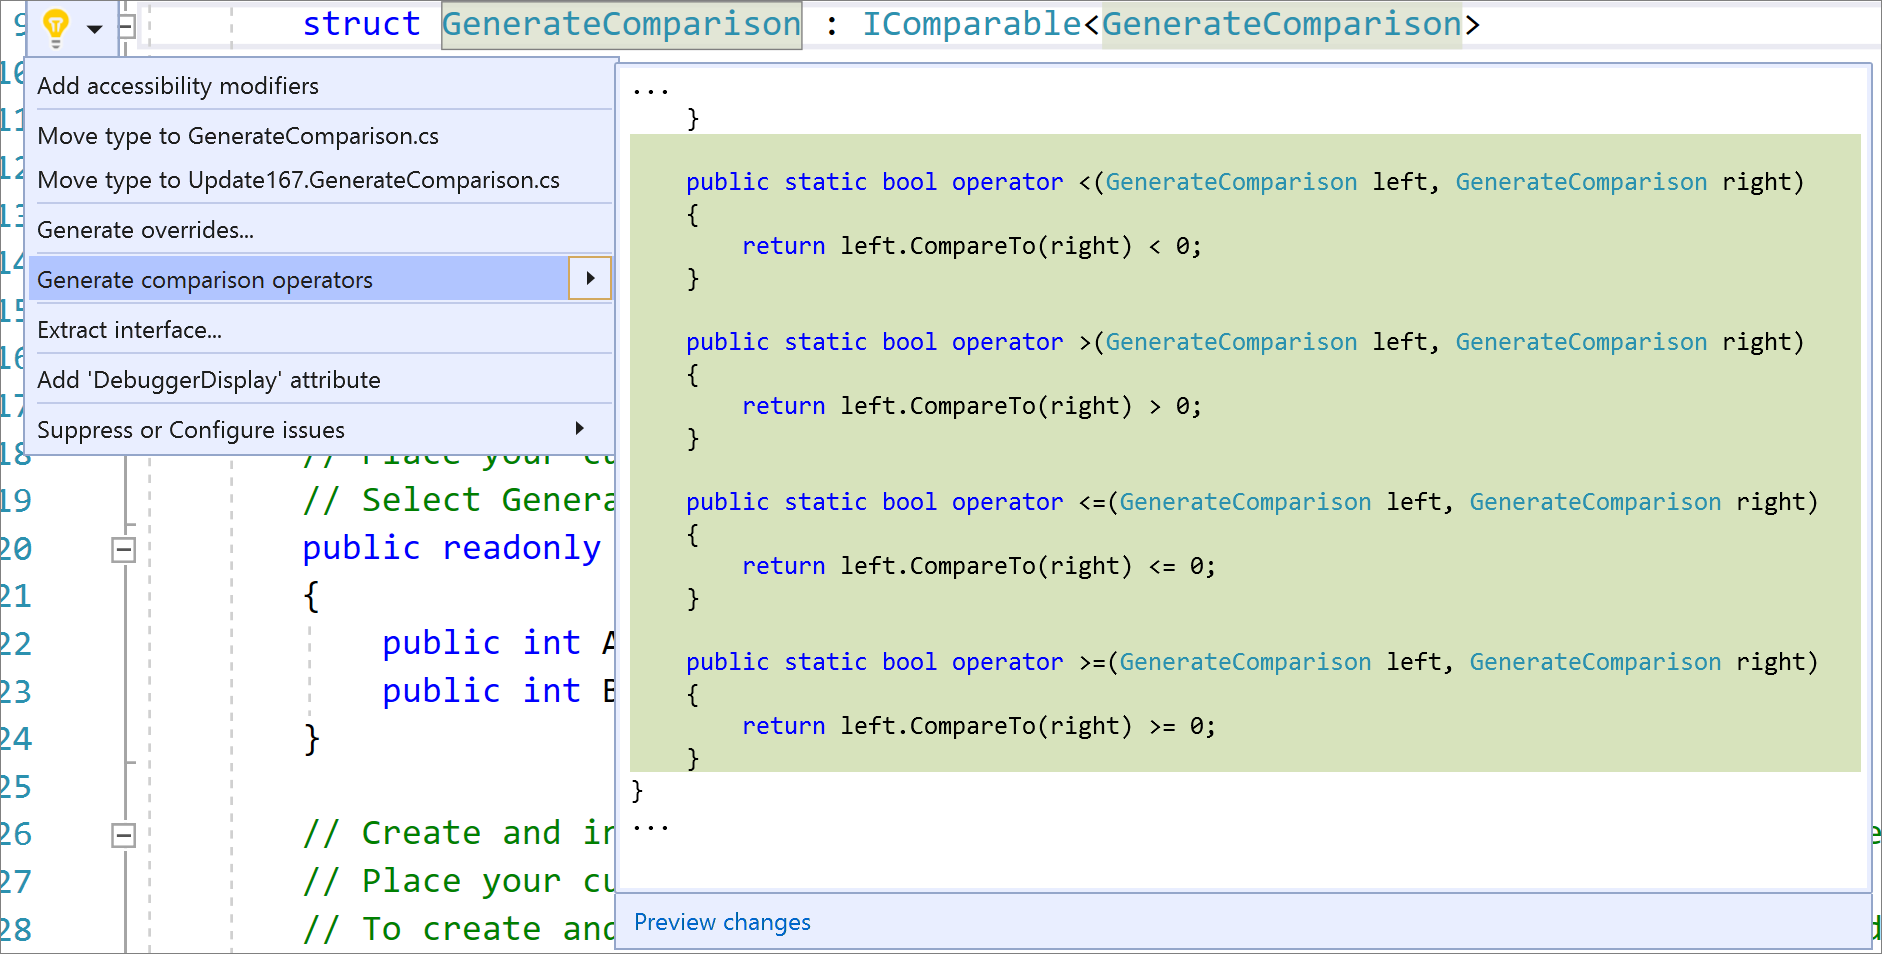
The generate comparison operators refactoring generates a boilerplate code with comparison operators for types that implement IComparable. Place your caret either inside the class or on IComparable. Press (Ctrl+.) to trigger the Quick Actions and Refactorings menu and select Generate comparison operators.
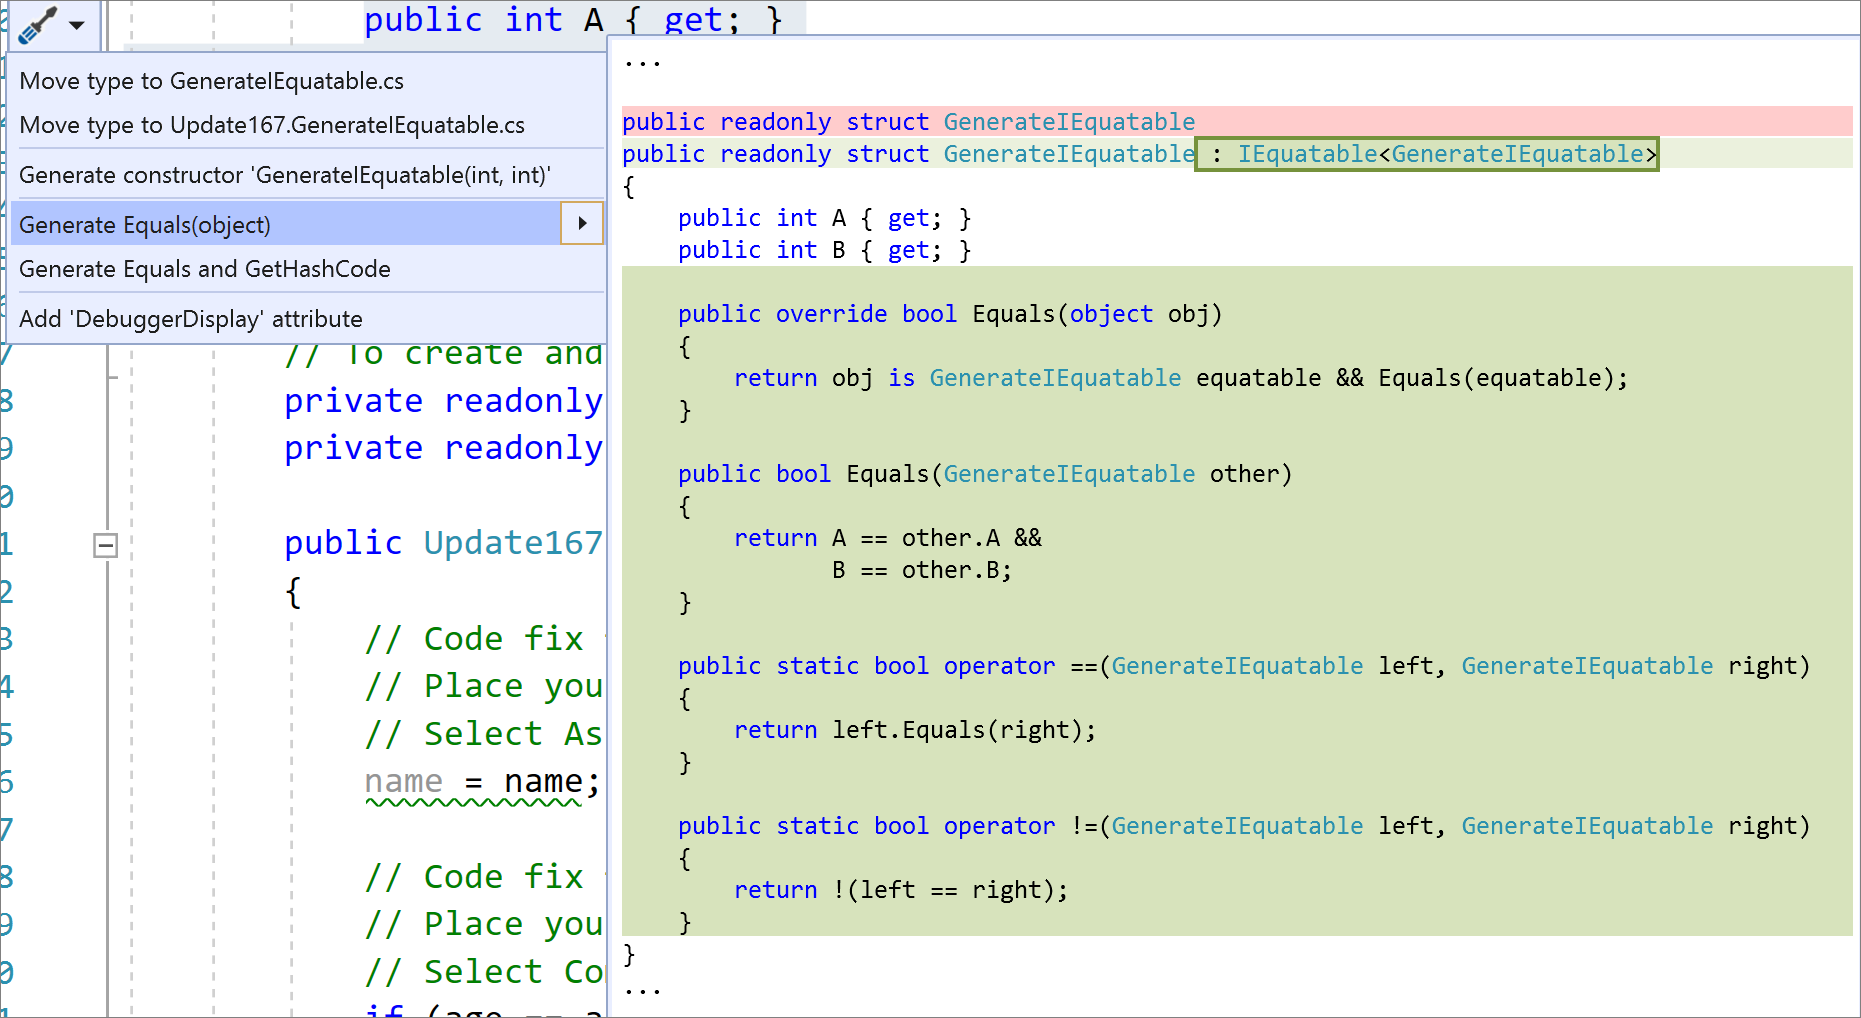
The generate IEquatable operators refactoring automatically adds the IEquatable as well as the equals and not equals operators for structs. Place your caret within the struct. Press (Ctrl+.) to trigger the Quick Actions and Refactorings menu and select Generate Equals(object).
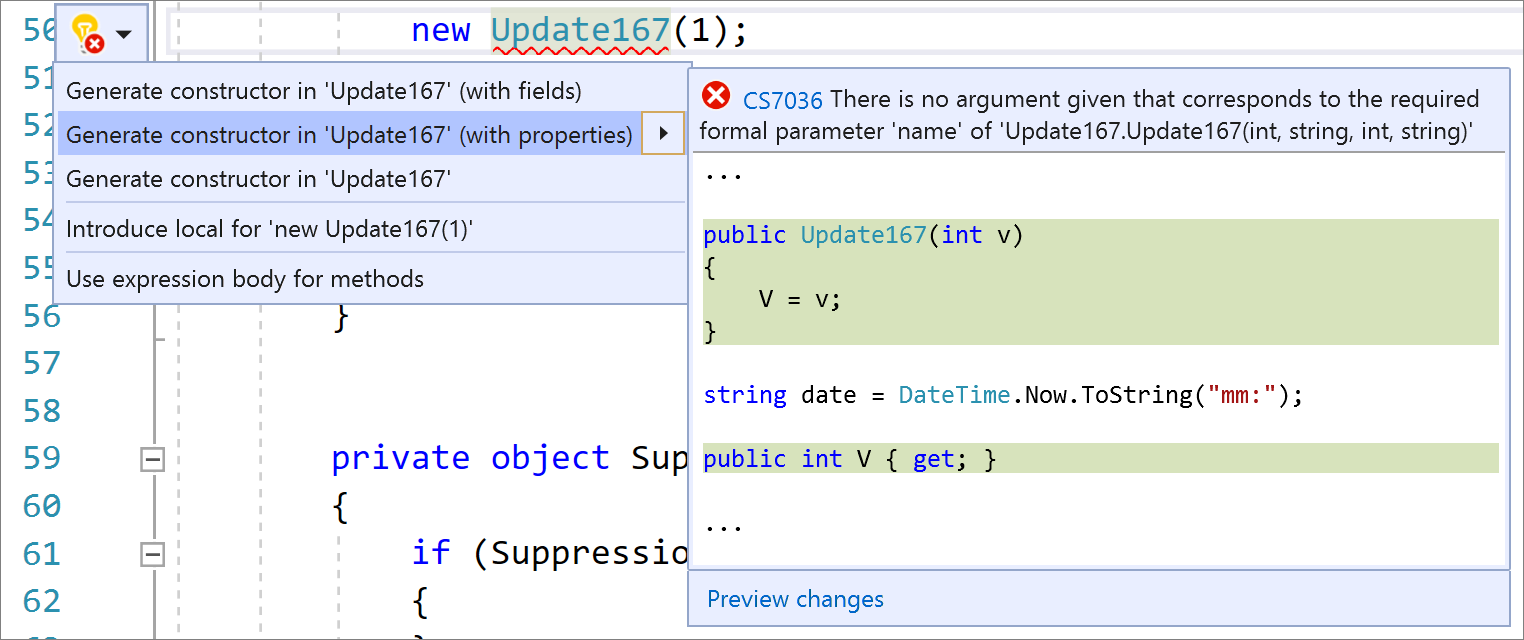
The generate properties when generating a constructor allows you to easily create a constructor with properties in a type. Place your caret on the instance. Press (Ctrl+.) to trigger the Quick Actions and Refactorings menu and select Select Generate constructor in <QualifiedName> (with properties).
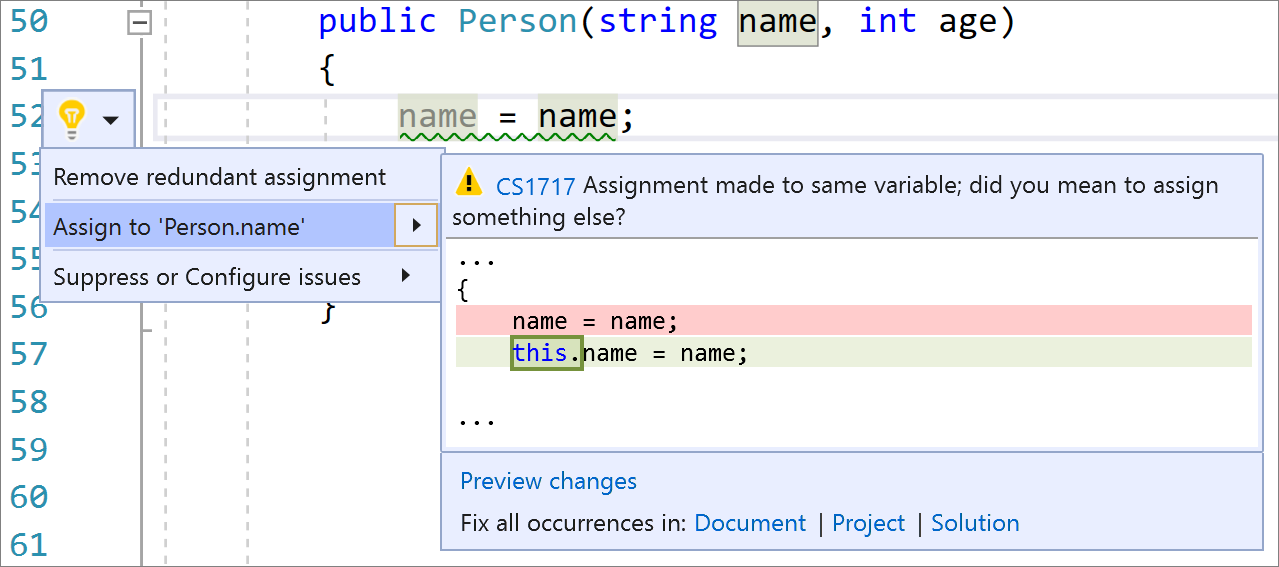
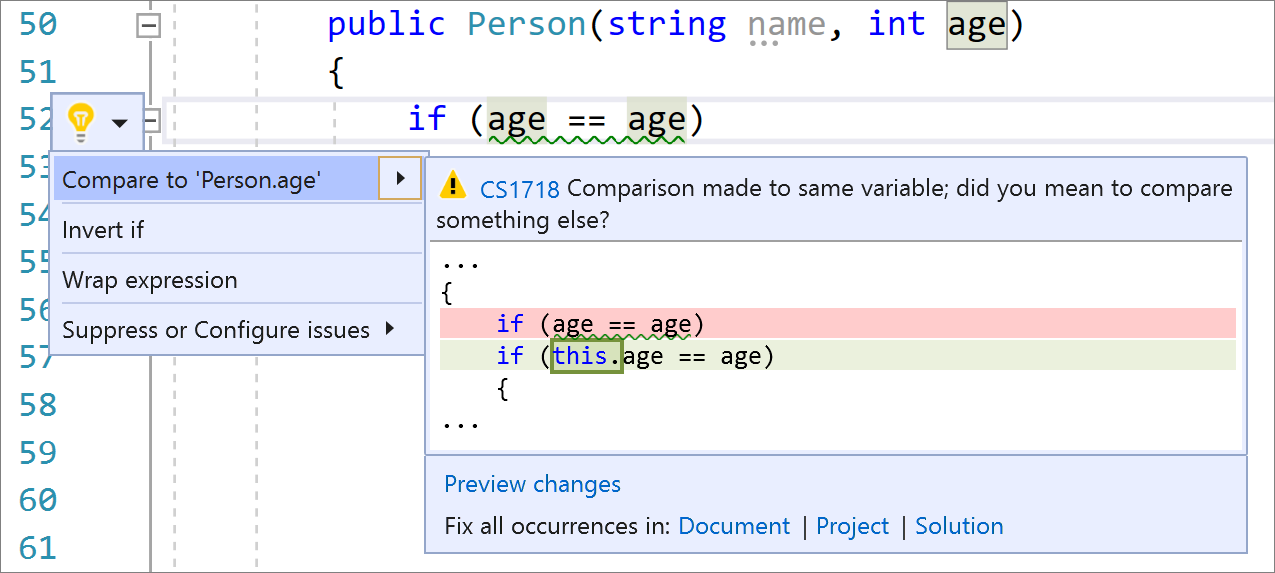
There’s now an easy fix for accidental assignments and comparisons. Place your caret on the warning. Press (Ctrl+.) to trigger the Quick Actions and Refactorings menu. Next, select from one of the following options:
For accidental assignments, select Assign to ‘<QualifiedName>.value’:
For accidental comparisons, select Compare to ‘<QualifiedName>.value’:
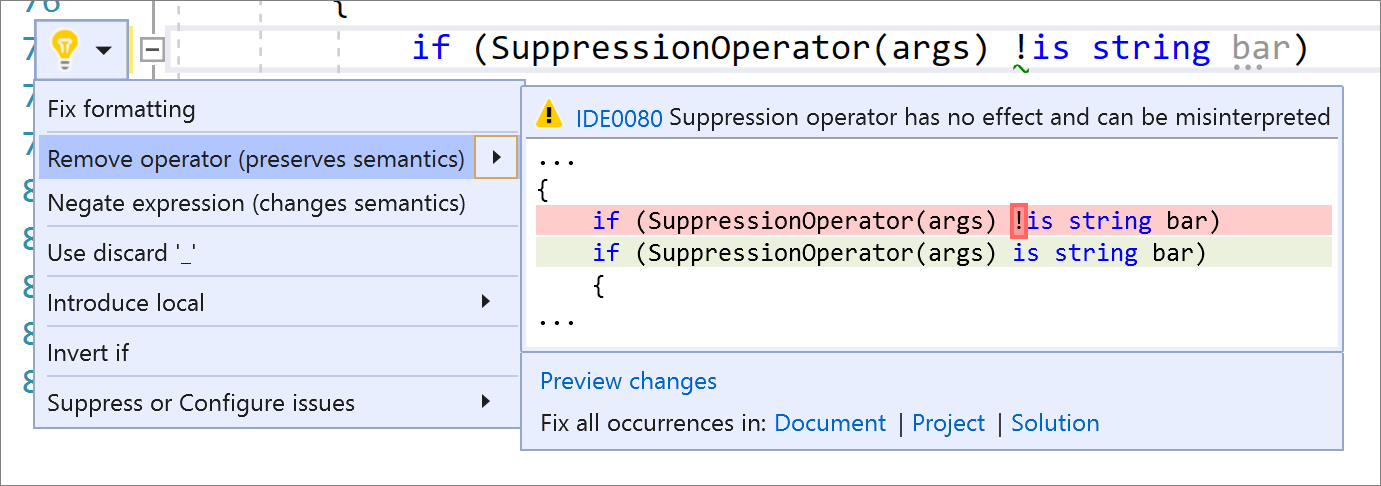
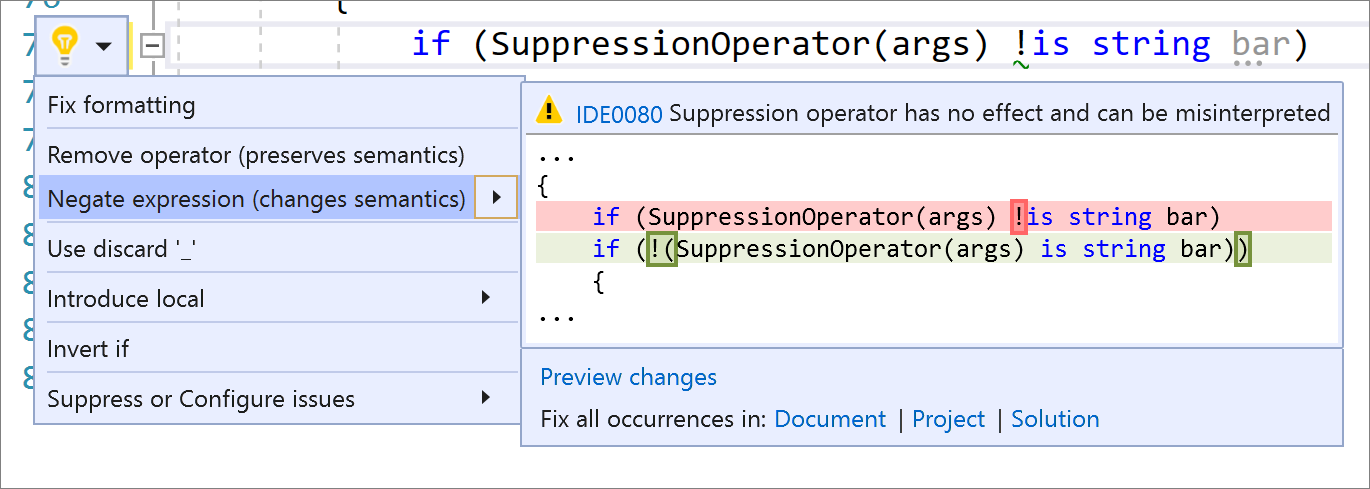
The null suppression operator warning and code fix helps you to easily identify and fix a suppression operator that has no effect. For example, in this case someone wanted to express that something isn’t `string` and typed `!is string` instead of `is not string`. The `!` is legal but is interpreted as asserting the expression on the left as is not `null`. Since that can be confusing, we now offer a warning and code fix. Place your caret on the suppression operator. Press (Ctrl+.) to trigger the Quick Actions and Refactorings menu. Next, select from one of the following:
To remove the operator completely, select Remove operator (preserves semantics):
To negate the expression, select Negate expression (change semantics):
Get involved
The post Learn about the latest .NET Productivity features appeared first on .NET Blog.
source https://devblogs.microsoft.com/dotnet/learn-about-the-latest-net-productivity-features/