
Continuous integration workflow template for .NET Core desktop apps with GitHub Actions

We know how time consuming it can be to quickly set up continuous integration and continuous deployment workflows (CI/CD) for your WPF and Windows Forms desktop applications.

That’s why, in cooperation with the GitHub Actions team, we have released a starter workflow in GitHub to help you quickly set up and showcase DevOps for your applications using the recently released GitHub Actions.

With GitHub Actions, you can quickly and easily automate your software workflows with CI/CD.

  • Integrate code changes directly into GitHub to speed up development cycles
  • Trigger builds to quickly identify build breaks and create testable debug builds
  • Continuously run tests to identify and eliminate bugs
  • Automatically sign, package and deploy branches that pass tests

The starter workflow template can be added directly to your project in a few simple steps, and with minimal configuration, allowing you to quickly set up a DevOps workflow in GitHub.

Like the .NET Core starter workflow template, this .NET Core Desktop template provides the commands to build and test your application on any of GitHub’s available hosted runner types, such as Windows, Mac OS or Ubuntu.

However, the WPF .NET Core starter workflow takes things a few steps further. For example, in addition to providing the steps to build and test your app, this workflow template details the steps necessary to securely use your signing certificate in a GitHub continuous integration pipeline. Furthermore, with this template, you will be able to generate a package of your app for testing or release, by leveraging a Windows Application Packaging Project.

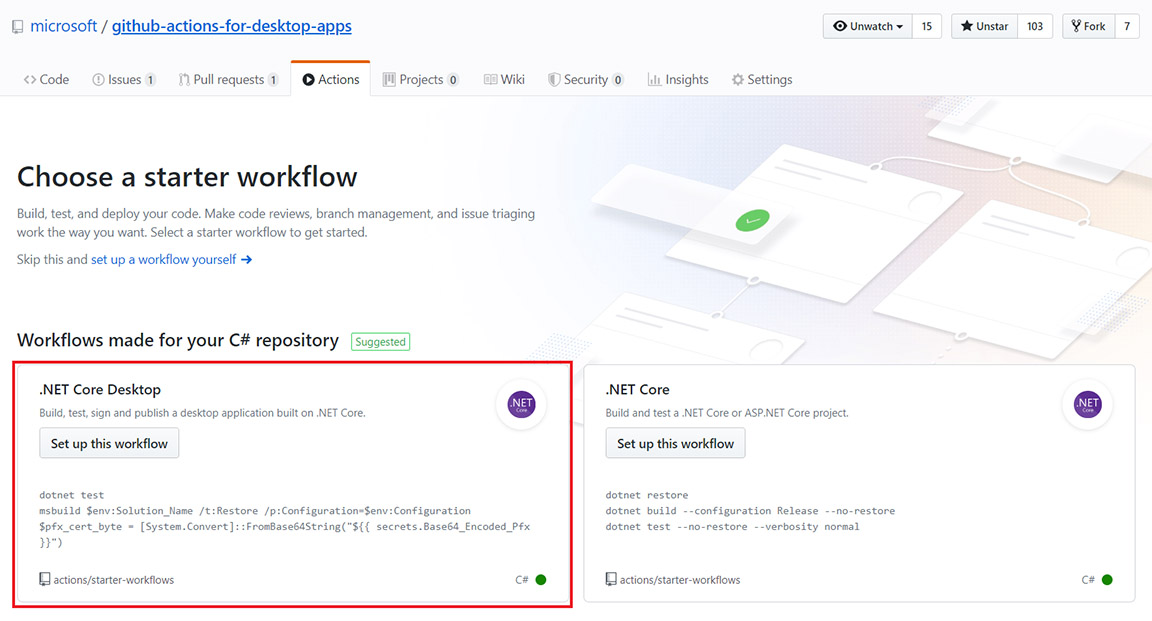
To add the workflow:

  1. Navigate to the “Actions” tab in your GitHub project.
  2. Click the “New workflow” button.
  3. Select “Set up this workflow” in the “.NET Core Desktop” workflow.
  4. Commit the file to your repo.

Image github actions workflow template

Once added to your repo, follow the instructions to configure the workflow for your project!
If you have any questions or feedback, please file issues on GitHub.

The post Continuous integration workflow template for .NET Core desktop apps with GitHub Actions appeared first on .NET Blog.


source https://devblogs.microsoft.com/dotnet/continuous-integration-workflow-template-for-net-core-desktop-apps-with-github-actions/

Comments

Popular posts from this blog

Fake CVR Generator Denmark

What Is Danish CVR The Central Business Register (CVR) is the central register of the state with information on all Danish companies. Since 1999, the Central Business Register has been the authoritative register for current and historical basic data on all registered companies in Denmark. Data comes from the companies' own registrations on Virk Report. There is also information on associations and public authorities in the CVR. As of 2018, CVR also contains information on Greenlandic companies, associations and authorities. In CVR at Virk you can do single lookups, filtered searches, create extracts and subscriptions, and retrieve a wide range of company documents and transcripts. Generate Danish CVR For Test (Fake) Click the button below to generate the valid CVR number for Denmark. You can click multiple times to generate several numbers. These numbers can be used to Test your sofware application that uses CVR, or Testing CVR APIs that Danish Govt provide. Generate

How To Iterate Dictionary Object

Dictionary is a object that can store values in Key-Value pair. its just like a list, the only difference is: List can be iterate using index(0-n) but not the Dictionary . Generally when we try to iterate the dictionary we get below error: " Collection was modified; enumeration operation may not execute. " So How to parse a dictionary and modify its values?? To iterate dictionary we must loop through it's keys or key - value pair. Using keys

How To Append Data to HTML5 localStorage or sessionStorage?

The localStorage property allows you to access a local Storage object. localStorage is similar to sessionStorage. The only difference is that, while data stored in localStorage has no expiration time untill unless user deletes his cache, data stored in sessionStorage gets cleared when the originating window or tab get closed. These are new HTML5 objects and provide these methods to deal with it: The following snippet accesses the current domain's local Storage object and adds a data item to it using Storage.setItem() . localStorage.setItem('myFav', 'Taylor Swift'); or you can use the keyname directly as : localStorage.myFav = 'Taylor Swift'; To grab the value set in localStorage or sessionStorage, we can use localStorage.getItem("myFav"); or localStorage.myFav There's no append function for localStorage or sessionStorage objects. It's not hard to write one though.The simplest solution goes here: But we can kee